
The flexible Windows operating system provides solid performance yet still encounters occasional issues that disrupt work processes. Mastering standard Windows problems along with their solutions serves both as a time-saving method and as a way to reduce irritation. The following text breaks down seven common Windows problems through comprehensive diagnostic and resolution steps.
These methods provide effective solutions for diagnosing all Windows-related problems that lead to startup blue screens and application malfunctioning. Also users may want to know about handle common PC problems without any problem.
How to Fix Common Windows Problems & Errors?
The first step to resolve frequent Windows 10 errors requires us to detect their root cause. The following step-by-step guide explains both the error reasons and repair protocols.
#1 Error : Error Code 0x80070087
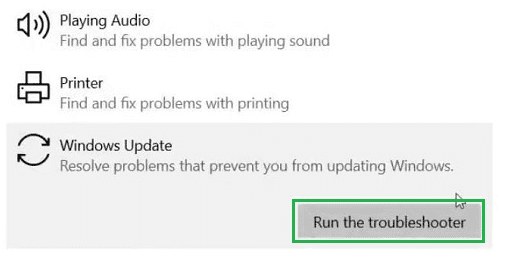
The Windows error shows code 0x80070087 when Windows Update creates an installation failure. Errors of this type exist in the Windows 10 and Windows 11 operating systems. The installed device packages can fail to download properly. Therefore the complete installation process cannot finish. Such errors take place in these circumstances.
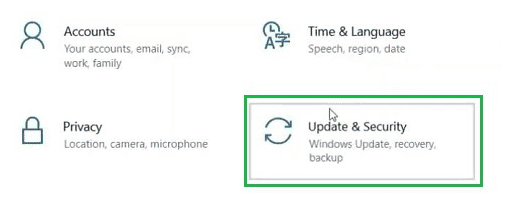
Step 1: Use the Control Panel to search for Update & Security under its options. Go for it.
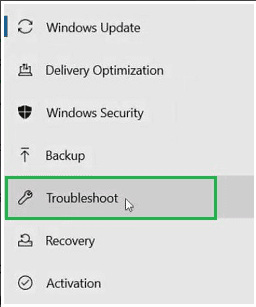
Step 2: You will locate Troubleshoot in the left-hand side panel. Click on that.
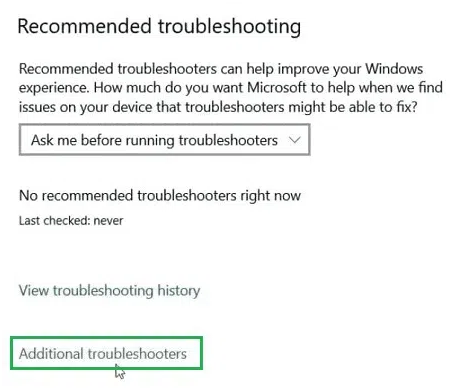
Step 3: Further options exist on the right-hand side panel. Go for the Additional Troubleshooters.
Step 4: The Windows Update stands among other installed applications that you will observe within the list. A click will expand the window before revealing the Run The Troubleshooter button. The system will examine the problem before starting to perform the update process.
Through these steps we have handled one of the regular Windows system errors known as Error Code 0x80070087.
#2 Error: Unresponsive Application
Windows operating systems encounter this problem most frequently because multiple applications run poorly on the device simultaneously. When these applications keep their window open users face a situation where they cannot execute any operations on the screen. There is no response from the close button that does not function on that unphiltered application.
Step 1: Users need to do a right-click on the task bar to view available choices. Click on Task Manager from the list of options by right-clicking over the Task Bar.
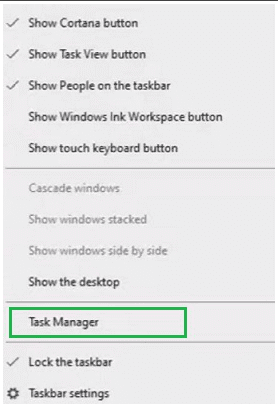
Step 2: Examine the unresponsive application from the application list. The user can display additional options by right-clicking on an application. Select the End Task button. It will close the application.

To address this common Windows problem called Unresponsive Application our team finalized its resolution.
#3 Error: Device Running Slower Than Usual
Windows users encounter this regular problem quite frequently. Daily performance of the device becomes progressively slower. Any application could be the cause of this issue. All device functions begin to operate more slowly. The large number of cache files stored in Drive C creates performance issues which cleaning Drive C would resolve.
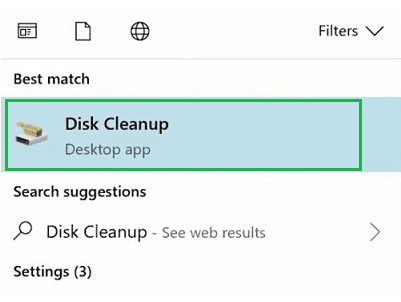
Step 1: Use the Search Bar to locate Disk Cleanup after which select the visible clickable option.
Step 2: The window presents a small selection area to enable all Checkboxes. Select all data fields and press the Clean Up System Files button.
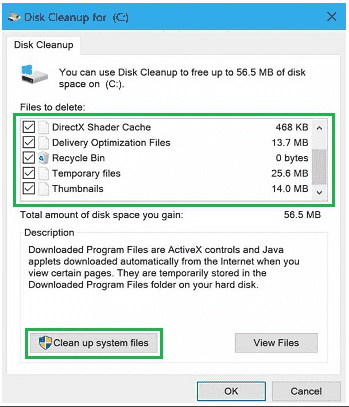
Step 3: The current display screen persists following the cleanup procedure. Rephrase the following Checkboxes & hit the OK button again.
The process has resolved the widespread Windows slow performance problem that affects devices.
#4 Error: Disk Errors and Driver Conflicts
Users encounter technical problems with both device disks and drivers occasionally. The Disk stops responding which prevents users from running suitable tasks. The File Manager starts showing errors as part of the malfunctioning process. Dedicated troubleshooters possess the skills to remove disk problems because these issues arise due to encounters with disk problems.
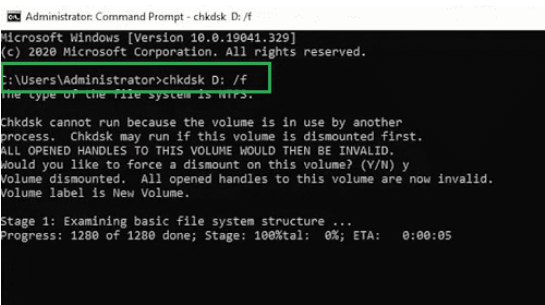
Step 1: Locate the Command Prompt through the Search Bar by selecting its top result then open it as administrator. Start the Command Prompt through Administrator access.
Step 2: Issue this command within the command prompt. The process execution will require some waiting time. The command identifies all types of issues affecting Disk and Drivers. No proper result appears during execution. After the process finished the window vanished.
Step 3: You must start the Command Prompt by using Administrator access and then run this program. The command issued here will solve all problems detected in the previous command. The process execution time should be monitored until it finishes.
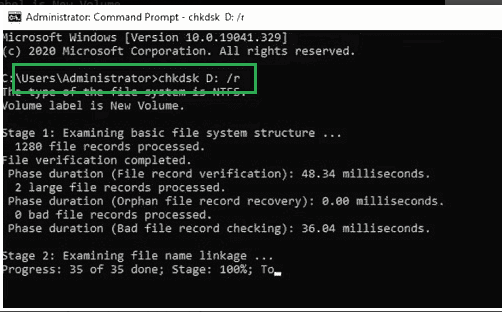
The implementation resolved one of the Windows’ most common problems regarding Disk and Drivers.
#5 Error: Malfunctioning Bluetooth Driver
The Bluetooth function of the device suffers from constant performance difficulties. There is either a failure to open Bluetooth connectivity or Bluetooth buttons cannot initiate system operation. The pairing process for systems encounters problems occasionally because of this issue. The service problem within the Bluetooth application stands as the core reason behind this issue.
Step 1: Open the Services through the Search Bar then select the appearing option.
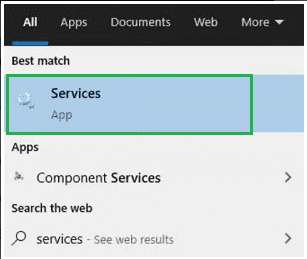
Step 2: A large number of applications appear in the following window. Among them double click on the Bluetooth Audio Gateway Service option. Click the Start button after selecting the startup type as Automatic. Click on OK to finalize changes while closing the window.
We successfully eliminated the recurring Windows issue Bluetooth Driver Not Working.
#6 Error: Speaker Not Working
Many devices demonstrate this regular Windows problem as a recurring issue. When users remove speakers they tend to switch their connection to different devices. Users may switch between using Bluetooth speakers while operating their device. The speaker gets disconnected from the device when users perform such operations.
1: Open the Search Bar then choose the most appropriate result for the Control Panel.
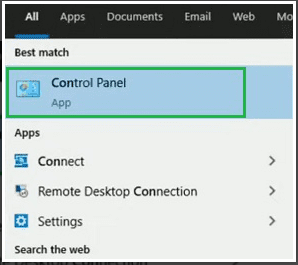
2: To resolve the issue open the Hardware and Sound settings through the provided options.
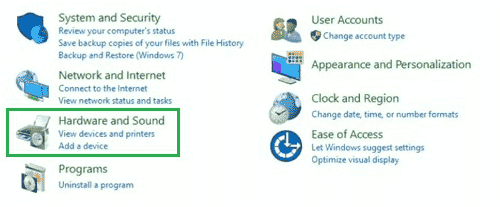
3: You should click on Manage Audio Devices located in the Sound section.
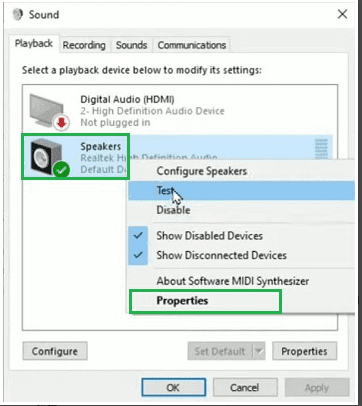
4: Speakers can be accessed through an available selection. When you right-click on the Speaker button find Properties in the sub-menu.
Step 5: From the properties selection choose the Use This Device (Enable) option through the drop-down list. Click on OK.
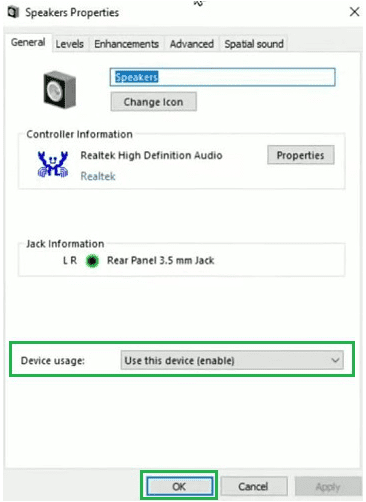
Through the described steps we managed to remedy the problem of Default Speaker Not Working on Windows systems.
#7 Error: USB Ports Not Working
An adequate number of USB ports exists on Laptop or Desktop computers. Several USB ports appear within the system and one or two ports stop working with no reason. The targeted USB port becomes unresponsive to data reading when attached to the device. The specific USB Port malfunction occurs because the user has been using it too much.
Step 1: The Device Manager option can be accessed through a search bar input.
Step 2: Among the presented options you will locate Universal Serial Bus Controller. Select a different sub-menu from the expandable option which shows USB Root Hub. Double-click over that option.
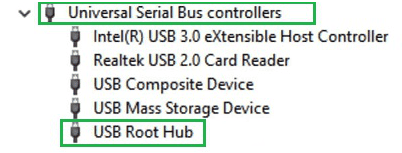
Step 3: Users should remove the check mark from the Power Management tab and then click OK from the new window.

The solution has resolved the common Windows problem of Unresponsive USB Ports.
Conclusion
Windows issues become irritating yet proper knowledge and supporting tools let you resolve such problems swiftly. The resolution of seven common Windows problems will secure your system efficiency while minimizing work interruptions. Regular maintenance together with software updates and active problem monitoring will help users stay away from such issues.